
After reading about Caltopo and how awesome it was, I finally started to use it lately to plan trips and make my own maps. Basically, you can make your own map and print it out using your own printer or maybe a really nice printer at work. Additionally, you can export the map to various map apps on your phone, allowing you to have a GPS compatible map that shows where you are as you are hiking, just like a GPS unit.
The purpose of this post is to show you quickly how to make a map, print it, and also export it to PDF maps so you can use your phone as a GPS unit. At first glance its a little daunting, but actually very easy to use. Caltopo has its own tutorials, and to be honest it’s capable of things I don’t fully understand at this point. You should also check out Caltopo’s tutorials to learn about other capabilities and features.
For someone who has used exclusively paper maps supplemented with shitty screenshots of online maps, Caltopo is like trying bacon for the first time. Also, at the basic level it is free. Once Im finished making a map in Caltopo, I export to a GPS map app. For my purposes I use a free app on my phone called Avenza Maps. There are others that I hear work just as well.
So first, find an area you want to go to. Zoom in and check out all the trails and get an idea of a route you want to do. The idea is that you are going to map out your own route with a colored line. You can use existing trails/roads on the map or plan a bushwhack.
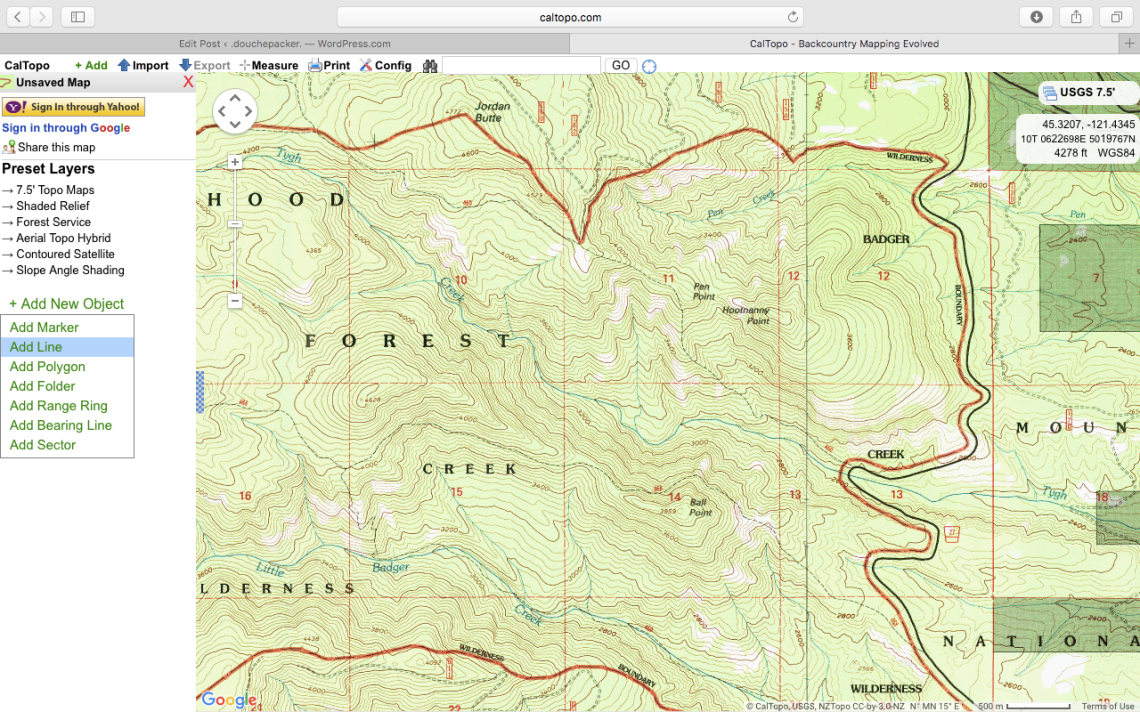
When you’re ready, click on “+Add New Object”.
(Alternatively, you can skip this part if you don’t want to draw lines of where you plan to go. In that case skip down to the first screenshot that shows the big red square. You can still print of a geospatial PDF that will work with your PDF App. This feature is great for planning out your adventures at home and allows you to get a better visual image of your route.)
Then when the menu descends click on “Add Line”.
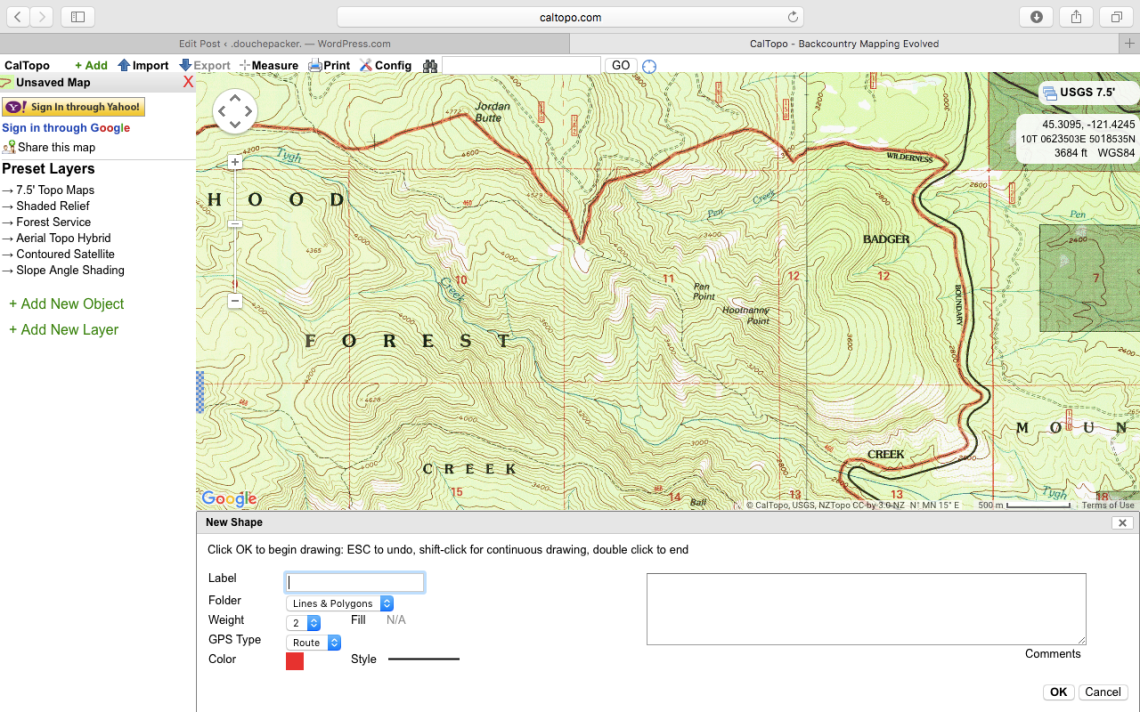
Then you’ll see these options at the bottom, which gives you some choices for the appearance of your line. For now, I’ll keep it at default options, but bump up the “weight” to 8 to make thicker line so you can see it easily. Read the very simple directions about how to draw your line and undo it if you make a mistake. Click OK and we will begin.
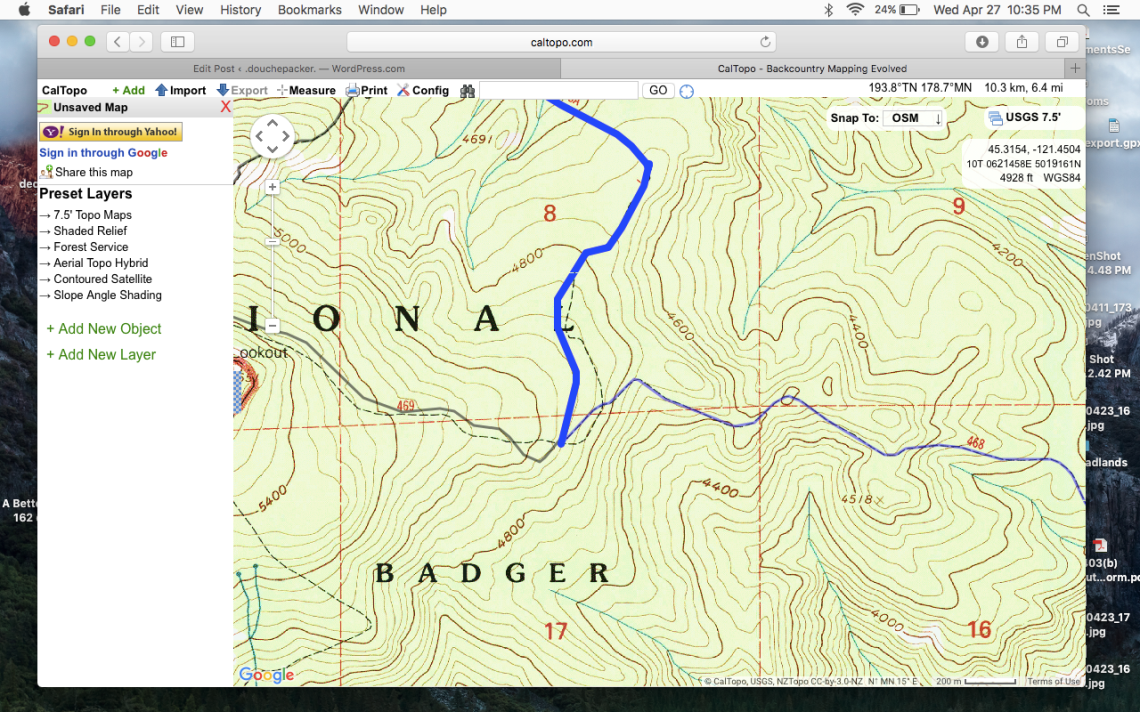
First click at the trailhead where you will begin and pull the line way out. Once you are in this mode, all the trails and roads will turn that dark grey color. I want to take the trail right above where the blue line is. Move your mouse over to the trail and it should highlight in the same color you chose your line to be, just fainter.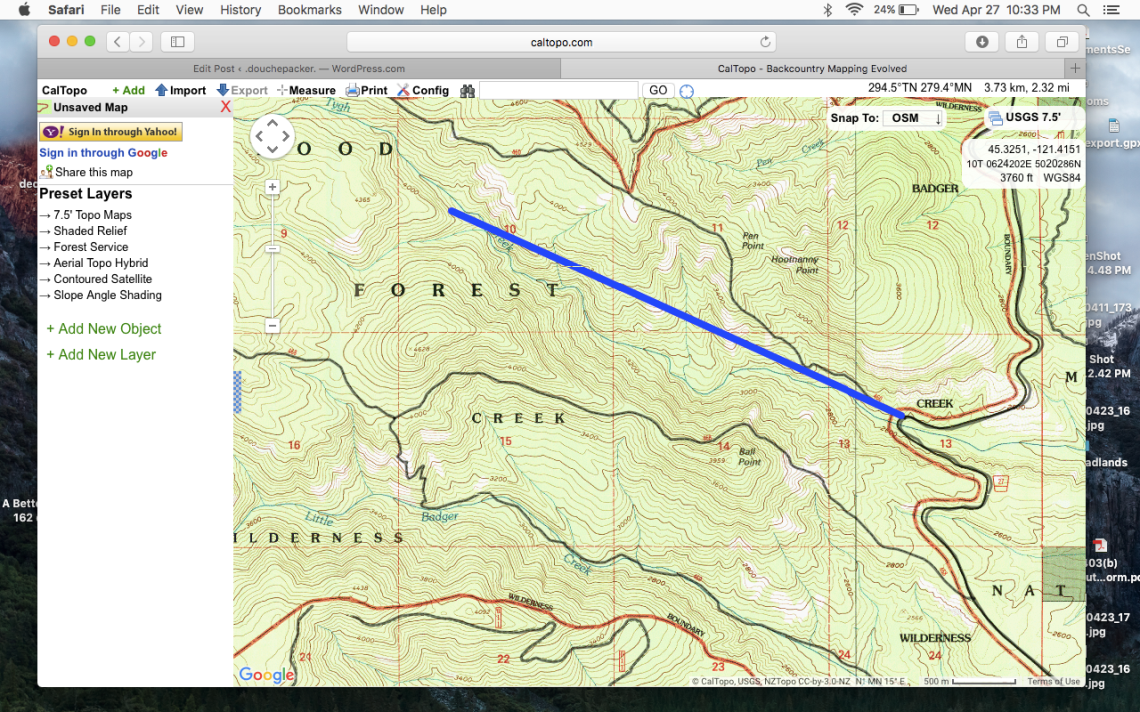
It should “snap” your line right onto the trail on the map. Click once to lock that part in:
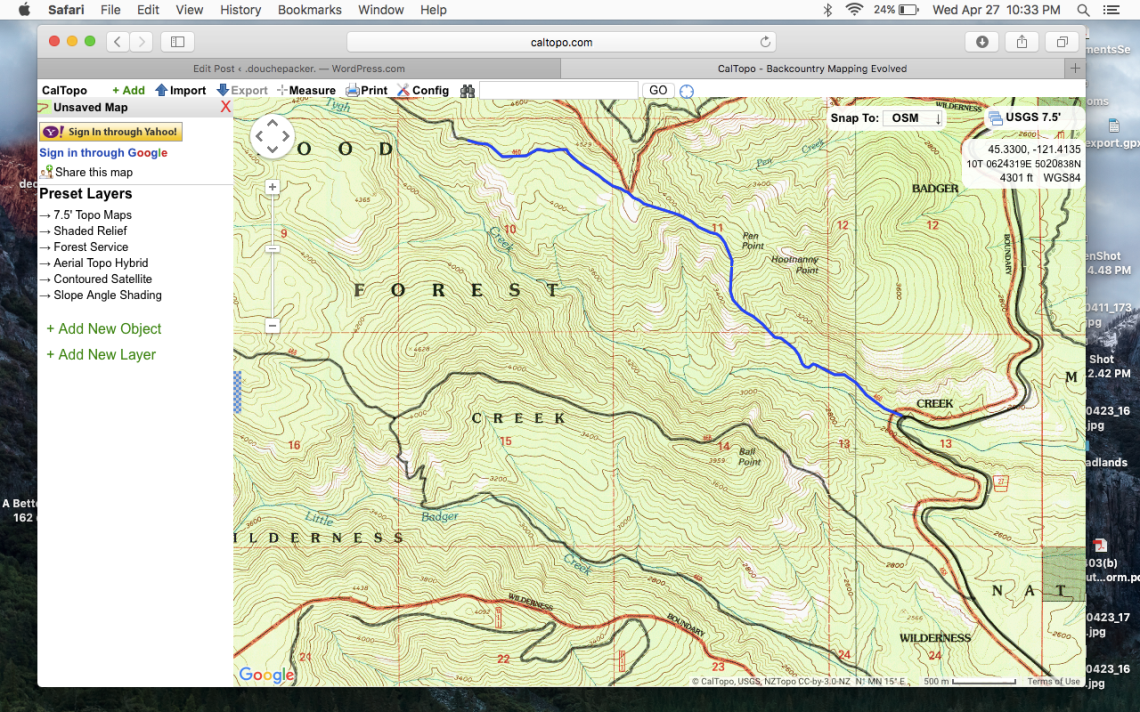
I’ll continue to click and follow that same trail to the west. It should continue to lock onto the trail as you click on it. Then I get to a point where I want to take trail 460A, however Caltopo doesn’t recognize it as a trail. For this, you just manually click along the trail line, trying to closely match what is on the map. I have the line pulled to the side for this shot so you can see the trail we want to follow.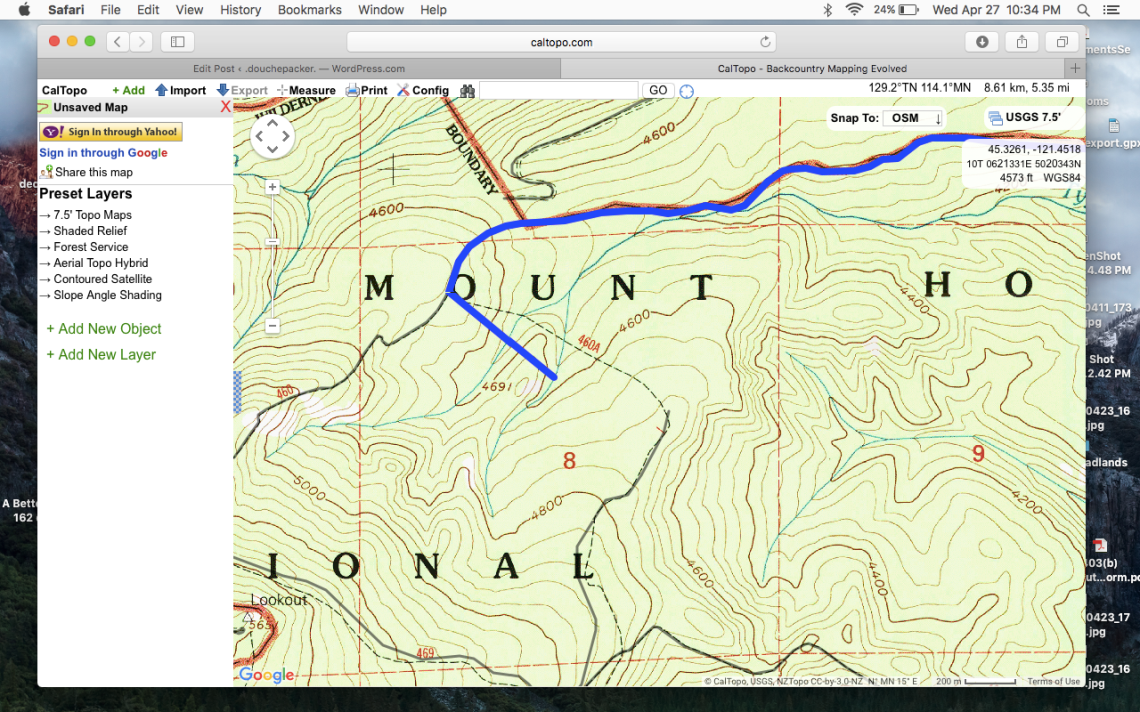
After manually clicking along trail 460A, it will look like this. Then you hook back into another trail that Caltopo recognizes. I’ll continue south, then head east on that trail at the bottom of this shot. This is a good time to point out that when Caltopo recognizes a trail, it isn’t always exact. Look at the trail headed south from my endpoint on the blue line. The dotted line is the trail, the solid is what Caltopo “sees”. Not quite exact, but whatever. Thats why you use this in conjunction with a paper map.
Now we’ll lock back in with the recognized trail, clicking along the way. In the first shot, note that if you want to lock onto a trail, hover over it and it will highlight in the same color you picked to use. Click when it highlights the right trail, and then follow it along just like you did earlier. It should lock onto this trail as we head east, clicking along the way. Sometimes this lock on feature is wonky, highlighting the wrong trail or adding on something you don’t want. No biggie, press ESC to take a step back.
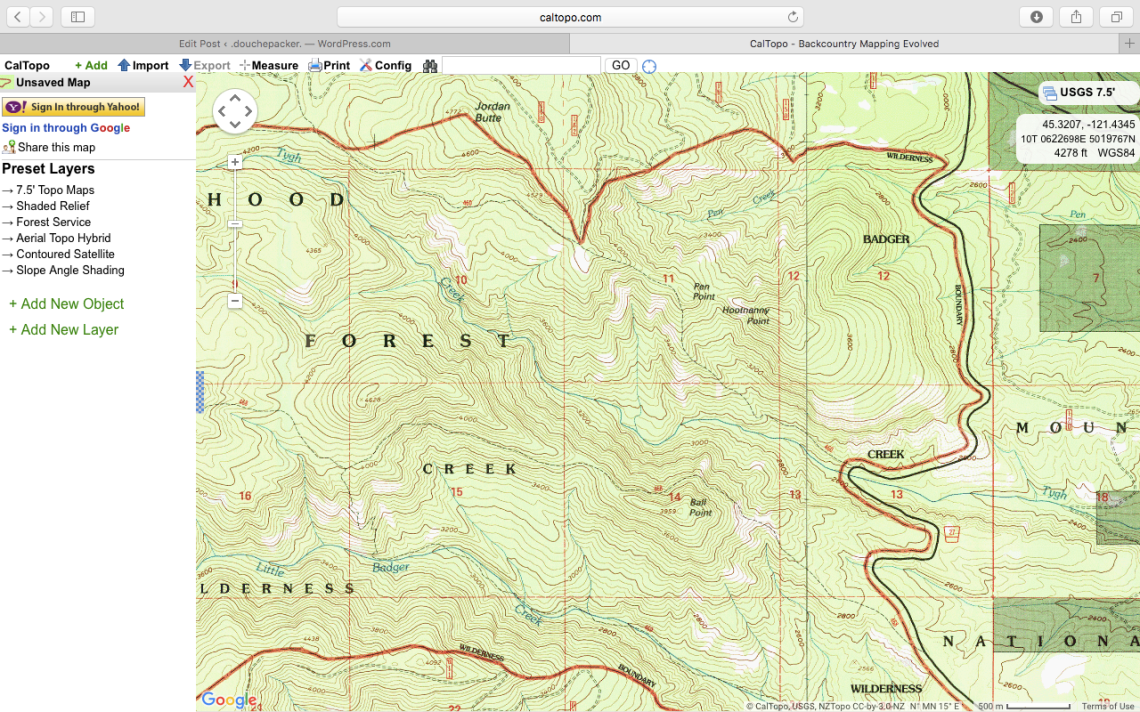
Eventually, you’ll complete a loop, this part happens to use a Forest Service road at the end to connect the end of the trail, back up to the original trailhead where you parked.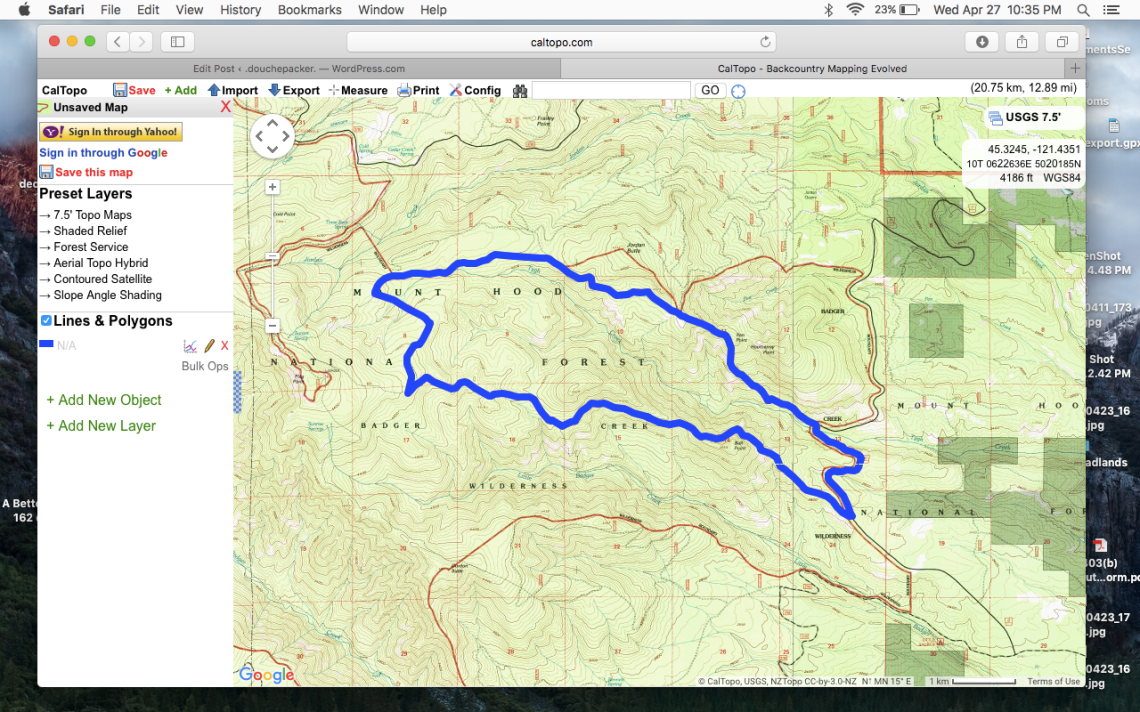
For fun, lets add on an extra excursion for this trip. I want to check out Flag Point and the Lookout Tower. Zoom back in. Lets use a different color this time to help differentiate it. I click to start on trail 460. I pull the line out by moving the mouse cursor.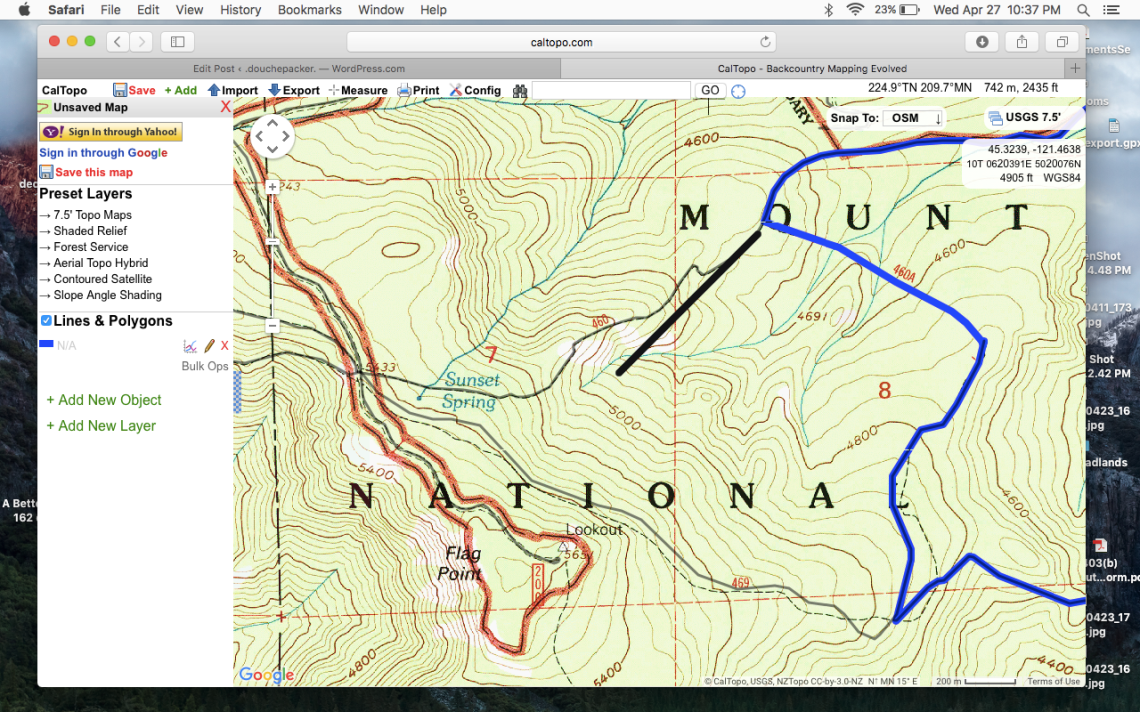
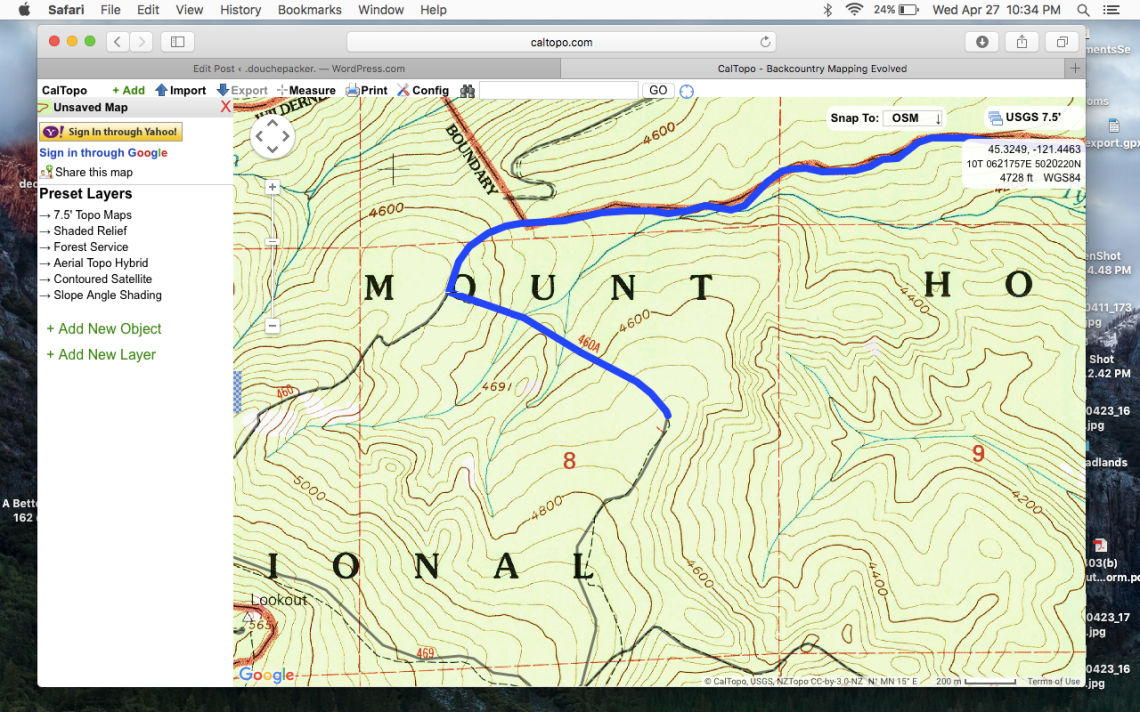
Then, it should lock onto this trail and we will click along all the way up to the Lookout Tower on Flag Point. Alternatively, you can move your cursor all the way to the Lookout and it should highlight that whole black part in one click.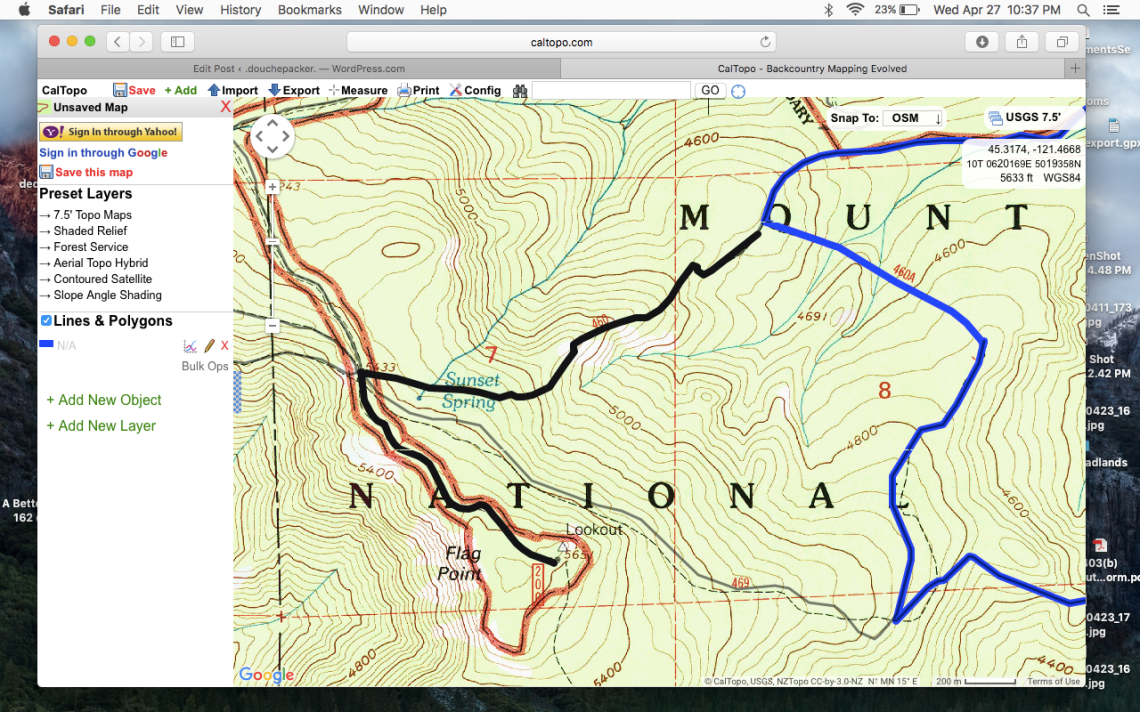
Instead of going back the same way, I want to walk downhill and take a shortcut to the trail. I won’t actually do this in real life, but this is an example of making your own trail on Caltopo, albeit a very short one. Click down the hill from the lookout and join back up with the trail You can plan any bushwhack this way. You can literally plan a route anywhere on the map you want to go. Make sure this matches your skill level in the field. Now make the black line end by double left-clicking.
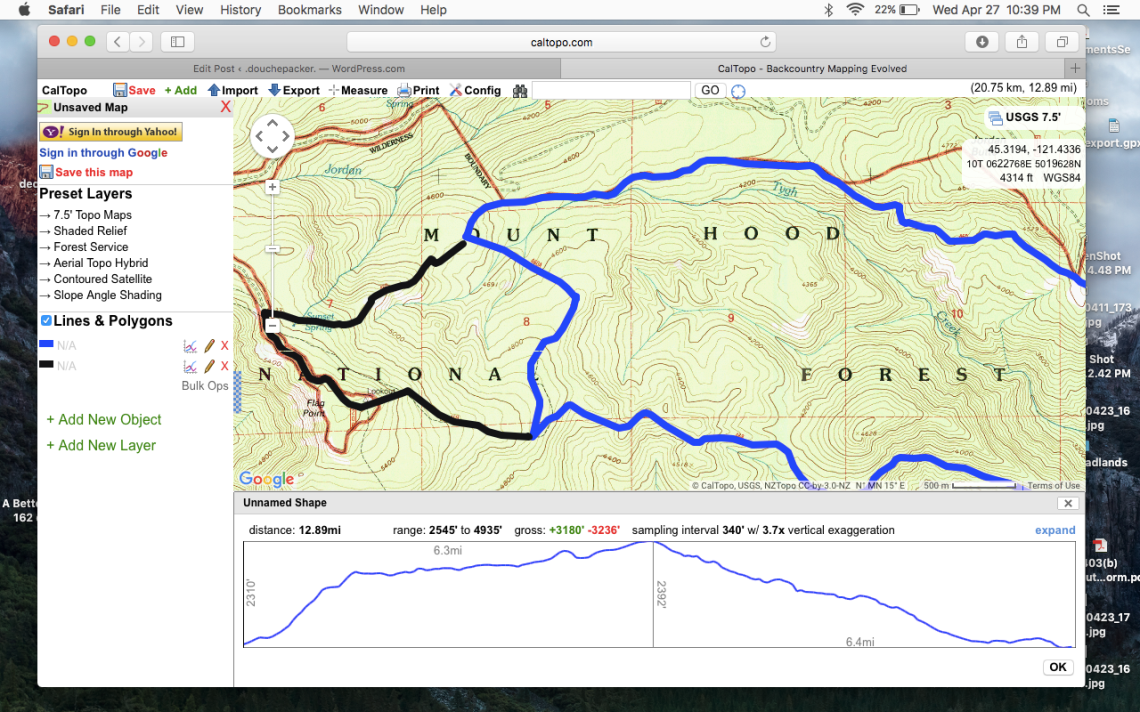
Now you’ve finished planning your big loop, and also mapped out a little side adventure: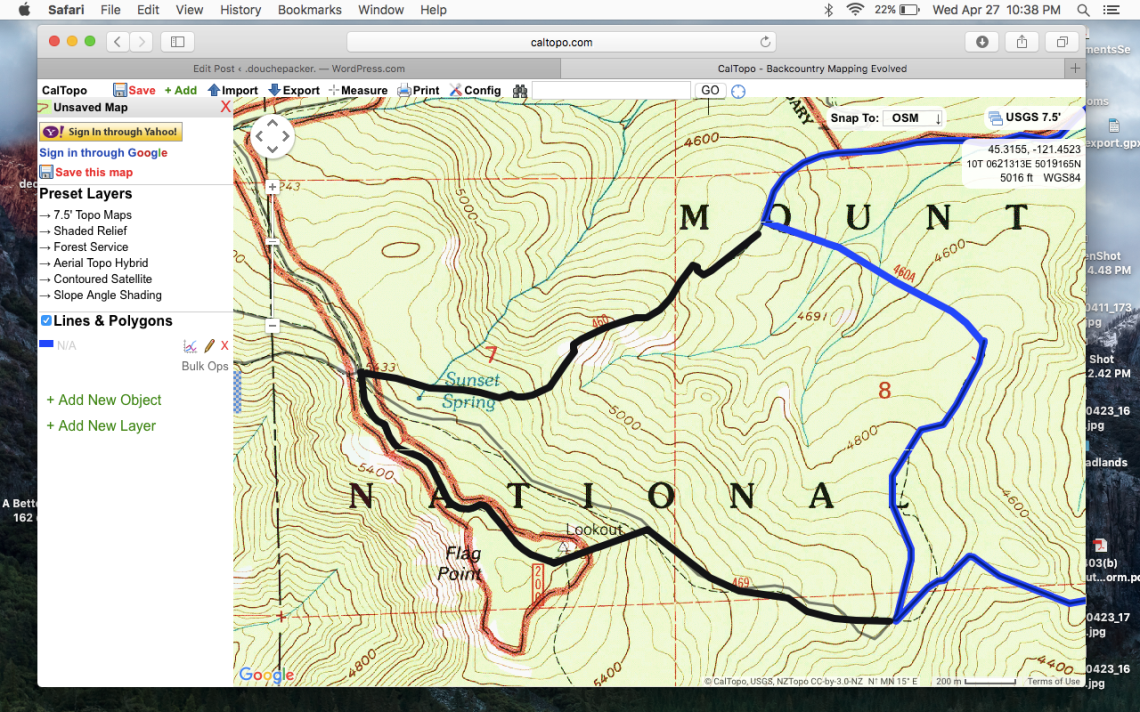
Look under “lines and polygons” on the left side. Click on the little graph symbol of one of your trails to see the elevation, distance, and halfway point of your journey. In this example we see that the blue trail is 12.89 miles long and an elevation range from 2545′ to 4935′. That is an estimate. Pretty cool eh?
Now that you’ve made your map lets do two things:
- Make a printable version that you can print off at home or work.
- Export to PDF Maps to use as GPS.
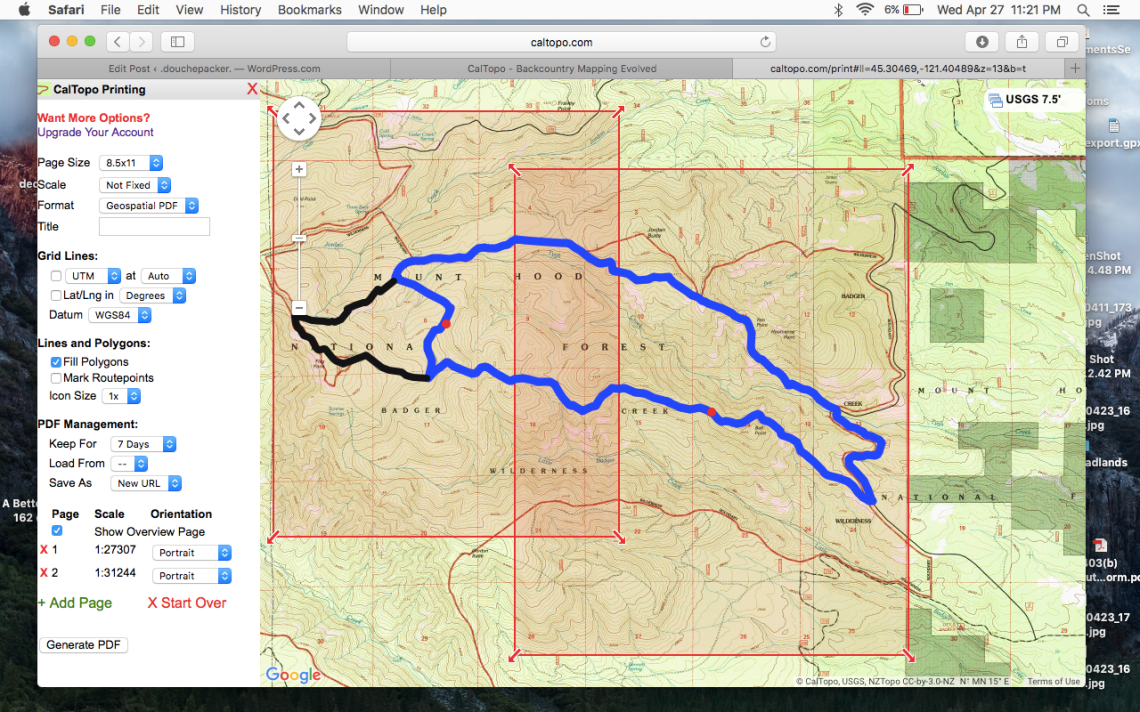
Zoom out to where you can see the whole loop, then go hover over “print” up top, then click on “print to PDF or JPEG”. 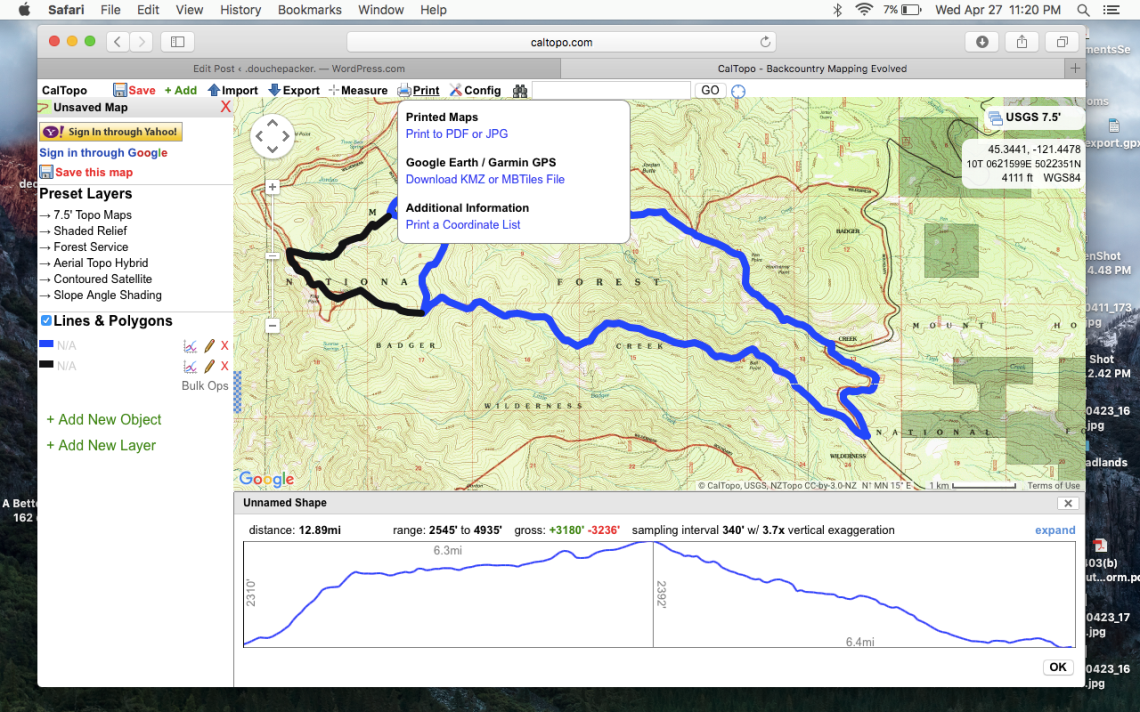
Caltopo will open a new window that looks like this. That red square will be what you will print. You can move it around and make it bigger or smaller to suit your needs. However, I like some detail, so I’ll actually add a second red square so I can get better detail of the Eastern portion of the trip. To do this, click on +Add Page in the bottom left hand side.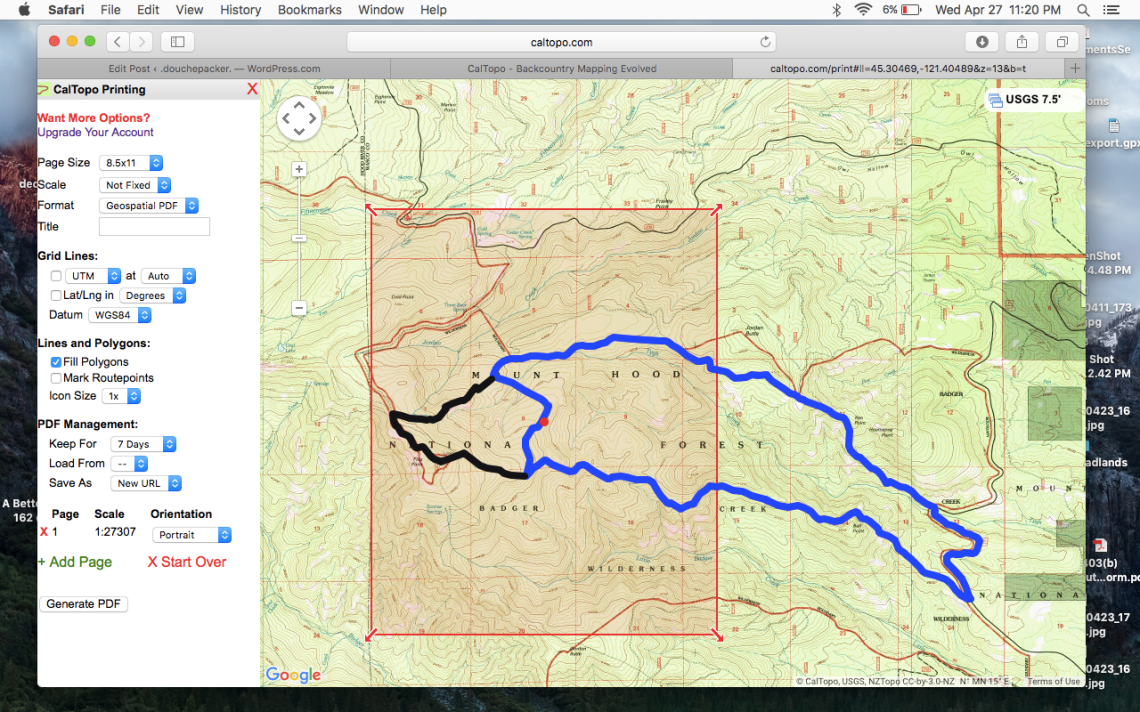
Then you’ll get a second red square that you can move around as well. I like to have some overlap on my maps as you can see. Move them to where you want. These red squares represent the actual map you’ll have, so choose wisely. When you’re finished click on “generate PDF” in the bottom left hand corner. Caltopo will open up a new tab.
It should show an overview, and the two separate maps for a total of three pages. Now save and print however you like. You’ve now finished and have your paper maps ready to roll. For an article about how to print your maps with better quality than your home printer look here.
To export to PDF Maps we will do this a little differently. This is because that map above for some reason doesn’t have geospatial capability when I export it to PDF Maps. You have to do them separately to get the geospatial capability. This allows you to see where you are on the map when you have the app on with your iPhone or Android.
- Make the first map with the red square like you did in the above example. Don’t make the second yet.
- Click generate PDF for the one red square ONLY. This will open the map in a new tab.
- Open PDF Maps on your phone. Touch the plus sign.
- Look at the second to last option “from QR code”.
- Touch “from QR code” and scan the QR code from the map on your computer screen and it will automatically load onto your phone and into the app!
- Now your phone will have this map in PDF Maps. Repeat for the other one and they will both have geospatial capability.
- DONE!!!
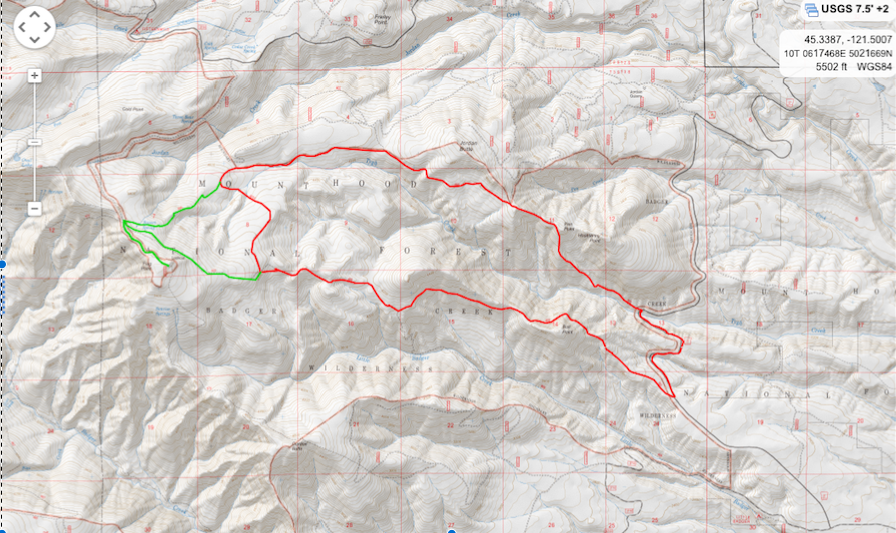
This method works for me, you may have a different Map App that you don’t have to go through that same method with. It looks daunting, but really this is very easy to get the hang of when you try it out. If you want to try to match my actions, look for the Badger Creek Wilderness in Oregon. It is just east of Mt Hood. Better yet, try somewhere you live near and want to go to. Be sure to check Caltopo out in more detail, including the tutorials there which are in video form 🙂 Upgrading from the free version lets you save more of your own maps and gives other features which I don’t know how to use at this point.
This is the most kick-ass map making app and I hope this was helpful in getting you off the ground in Caltopo.

Hi DP,
This is a very helpful post. I have been meaning to try PDF maps for a while, and this was enough of the tutorial to get me started. I have been using Caltopo for a long time, and generally use Gaia GPS is my go to phone app, but there are certainly some cases when the Avenza app could be helpful also.
Here’s another tip: when you have that PDF map saved to your hard drive, email it to yourself, and then save it into some sort of smart phone PDF reader, such as the native iBooks. This gives you a backup copy of the map onto your phone. If you lose your printed map, or need to share one with a friend, this is a back up that is free, easy, and weighs nothing.
LikeLike
Bad ass John! Nice tip, thanks for contributing.
LikeLike
I am new to the CalTopo tool and this tutorial is super helpful, but I found that when I drew my line alongside the trail I was marking, it did not snap to the trail as described. Did I miss something. I just get a straight line and I have to pull it to follow the trail.
LikeLike
That happens to me too… try this… wave your cursor on the trail until the whole thing highlights. Then left click. Then click on the next point along your route and it should snap right to it. Try that out and see if that helps
LikeLike
That did the trick. Thanks so much!
LikeLike
Excellent!
LikeLike
THANK YOU!!! New Year, new mapping app.
LikeLike
You’re welcome! Happy New Year!
LikeLike
whoah this blog is great i like reading your articles.
Keep up the good work! You realize, many individuals are
hunting around for this info, you could help them greatly. http://bit.ly/2lZh8pz
LikeLike
holy cow this is awesome. just made my first series of maps for a short weekend section on the AT! many thanks.
just a quick note — it looks like PDF Maps got bought by, or changed their name to, Avenza Maps. still seems to work pretty dang well.
also, and I don’t know if this is a new feature, but Avenza can read QR codes. so, when making a map in Caltopo you don’t have to type the URL in anymore! just start the QR reader and point your camera at your computer screen. what a time to be alive.
thanks again.
LikeLike
Thanks Eric! I’ll have to try out that QR feature soon. ONe bummer about Avenza is they limited the free maps to 3 of your own (when it was PDF maps it was unlimited). You could always pay to upgrade but it is pretty pricey
LikeLike
Oh my gosh, thank you SO MUCH, this is exactly what I needed!! I was getting so frustrated because I couldn’t import the PDF into the Avenza app! THANK YOU!!!
LikeLiked by 1 person
Hey, this was great! Thank you so much.
LikeLiked by 1 person
Glad to have found this old post. It has answered several of my questions. Thanks
LikeLiked by 1 person
anytime! glad you found it helpful
LikeLike